
If you're considering extending your driveway with matching block paving, it's important to approach the project methodically. Start by planning the layout and selecting pavers that blend seamlessly with your existing surface. The right preparation is critical for a stable and durable extension. As you progress, you'll discover the key steps that guarantee a professional finish. Let's explore the process, beginning with accurate measurements and effective excavation techniques.
Key Takeaways
- Mark the extension area accurately with stakes and string to ensure precise excavation and layout for the block paving.
- Choose block pavers that match the existing driveway for a cohesive look and ensure durability.
- Excavate the area to a depth of 150mm below the damp proof course, adjusting for soil conditions and drainage.
- Lay a stable sub-base using crushed stone or MOT Type 1, compacting each layer to promote long-term stability.
- Install pavers using a string line for alignment, compact them thoroughly, and fill joints with sand for durability.
Preparation and Planning for Your Driveway Extension
When you're ready to extend your driveway, careful preparation and planning are essential to guarantee a successful project.
Start with design considerations by marking the extension area using landscape stakes and string. Choose pavers that match your existing driveway for durability and aesthetic appeal, making sure they complement your home's exterior.
Don't forget to check local regulations to determine if you need permits for your extension, maintaining regulatory compliance.
Assess your budget by comparing material costs and deciding between DIY or professional installation.
Additionally, consider the right base materials, like crushed stone and sand, to guarantee a stable foundation. This is important as proper installation is crucial for longevity, setting the stage for a seamless driveway extension that enhances your property's value.
Step-by-Step Excavation Process
Having laid the groundwork for your driveway extension, it's time to begin the excavation process. Start by marking the area with string and pegs for accuracy.
You'll want to excavate 150mm below the damp proof course, adjusting for soil considerations if your ground is clay-heavy or if heavy vehicles will use the extension.
Utilize appropriate excavation techniques: a shovel works for small areas, but consider a mini-excavator for larger spaces. Remember to create a gradual slope of about 1:60 for drainage.
As you dig, ascertain you leave space for a 50mm layer of damp sharp sand and a stable sub-base, compacting the material in layers to guarantee durability. This preparation is crucial for ensuring effective water drainage and long-lasting results.
Your careful preparation sets the stage for a successful extension.
Laying the Sub-Base for Stability
As you progress with your driveway extension, laying a solid sub-base is essential for ensuring stability and longevity.
Start by selecting appropriate sub base materials like crushed stone or MOT Type 1, which provide excellent drainage and compaction. Spread the material evenly over the excavated area, ensuring a thickness of 4 to 6 inches.
Utilize effective compaction techniques, such as a plate compactor, to densely compact each layer before adding the next. Incorporate a geotextile membrane, especially in clay areas, to enhance stability.
Proper grading is vital; aim for a slight slope to promote drainage. Proper drainage solutions prevent water pooling and enhance the longevity of your driveway. By following these steps, you'll create a strong foundation that supports your block paving and prevents future settling.
Installing Block Pavers Seamlessly
With a solid sub-base in place, the next step involves the careful installation of block pavers to create a seamless extension of your driveway.
Begin by selecting paver patterns that complement your existing driveway while ensuring color matching for a cohesive look. Start laying the pavers from one corner, using a string line to maintain straight rows.
Place each paver flat on the sand bed, utilizing built-in spacers for consistent joint spacing. For any edges or obstacles, cut pavers with a diamond masonry blade for precise fits.
After laying, compact the pavers with a vibrating plate compactor to interlock them securely. Finally, sweep fine sand into the joints to lock everything in place, ensuring durability and aesthetics. This method not only enhances the aesthetic appeal of your driveway but also ensures a long-lasting solution.
Maintenance Tips for Longevity and Durability
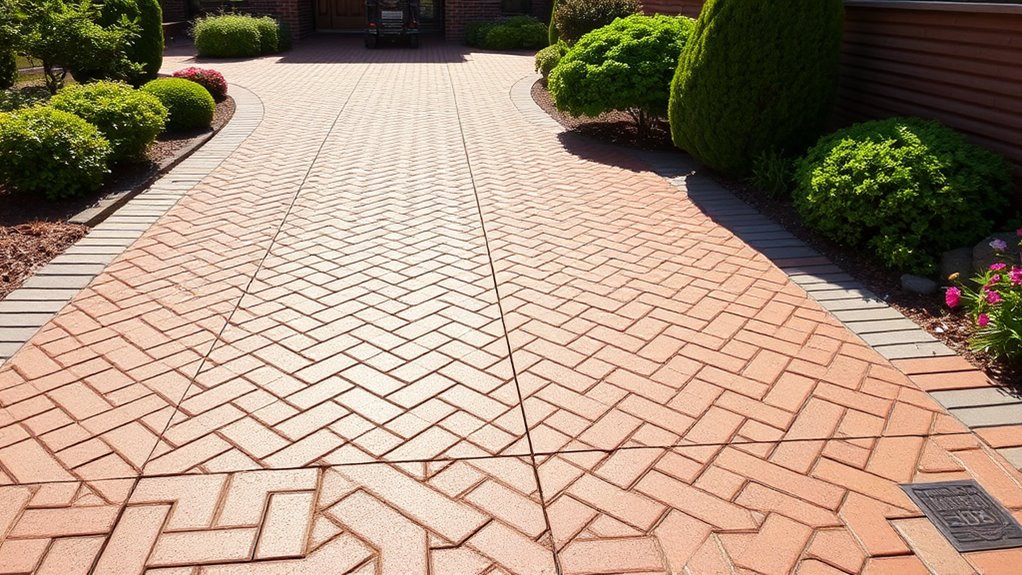
To guarantee your block paving remains in pristine condition, regular maintenance is essential.
Start by sweeping away debris with a stiff-bristle brush to keep the surface clean. Next, use hot soapy water and the same brush to clean any stubborn stains, then rinse with a hose to remove loose dirt.
Avoid power washing newly installed block paving for at least a month to prevent damage. For long-term durability, fill any gaps between pavers with filler sand after cleaning.
Consider applying sealants to protect against stains and weed growth. By committing to routine upkeep, you'll enhance both the lifespan and aesthetic appeal of your block paving, ensuring it withstands the test of time. Additionally, regular inspections for signs of damage will help you address any issues before they escalate.
Frequently Asked Questions
Do I Need a Permit for Driveway Extension Projects?
You'll likely need a permit for your driveway extension projects, as permit requirements vary by location. Check your local driveway regulations to guarantee compliance and avoid potential fines or complications during your expansion.
How Do I Choose the Right Block Paver Color?
"Beauty is in the eye of the beholder." When choosing paver color options, consider your design considerations carefully. Blend with surroundings, opt for complementary hues, and balance aesthetics with practical durability for lasting appeal.
Can I Extend My Driveway in Winter?
You can extend your driveway in winter, but prepare carefully. Ascertain proper snow removal and consider using permeable pavers to manage drainage. Monitor for frost heaving to prevent long-term damage during the cold months.
What Tools Do I Need for This Project?
To tackle your project, you'll need essential block paver tools and driveway extension equipment. Grab a rubber hammer, alignment bar, and paver cutter. Then, prepare your area with a shovel and plate compactor for a solid foundation.
How Long Will the Driveway Extension Take?
Your project timeline for extending the driveway can vary considerably based on weather considerations. Generally, expect a few days to a week, depending on preparation, installation, and curing time, ensuring ideal conditions for a durable finish.
Conclusion
By following these steps, you'll transform your driveway extension into a stunning masterpiece that'll make your neighbors green with envy! With careful planning, precise excavation, and expert paver installation, you'll create a durable surface that not only enhances your home's curb appeal but also stands the test of time. Don't forget regular maintenance to keep it looking as pristine as the day you laid it. Your driveway deserves nothing less than perfection!

Adding curb appeal to your home can be a daunting task, but it doesn't have to be. Designing and installing Read more

As homeowners, we are always looking for ways to improve and add value to our properties. One popular choice for Read more

Block paving, like a well-tended garden, is a testament to the care and attention given to one's property. Just as Read more