
When you're designing a block paving patio, you're considering the layout, selecting the right materials, and enhancing the space for gatherings. You want an inviting atmosphere that encourages friends and family to linger, but how do you achieve that balance of functionality and style? From thoughtful planning to the final touches, each step plays an essential role in creating a space that not only looks good but serves your entertaining needs. Let's explore the key elements that can transform your outdoor area into the perfect venue for memorable occasions.
Planning and Preparation
When designing your block paving patio, the first step is to meticulously plan and prepare for the project. Begin by establishing your patio dimensions with a tape measure to define the width and length.
Once you've determined the size, mark the corners using wooden stakes to create a clear outline of your space.
Next, it's essential to grade and slope the area, ensuring water drains away from any structures. Tie a string between the stakes to represent the top surface of the patio base, and adjust it according to the thickness of the base material you plan to use.
Clear the area of debris and vegetation, then excavate to the necessary depth, keeping block thickness and drainage in mind.
Lay down landscape fabric to enhance drainage and control weeds. Compact the base using a plate compactor or hand tamper for stability.
Finally, check that the base is level and free from bumps or depressions. This thorough site preparation sets the foundation for a flawless block paving patio, ensuring that your outdoor space is both functional and visually appealing. Additionally, proper installation methods are crucial for ensuring long-lasting durability of your patio.
Choosing the Right Pavers
Choosing the right pavers is vital for creating a stunning and functional block paving patio. You'll want to take into account various paver materials, each offering unique characteristics that can enhance your outdoor space.
Clay brick and concrete pavers are popular choices due to their durability and versatility. If you're aiming for elegance, natural stone pavers like travertine or bluestone can provide a striking, long-lasting appearance but at a higher cost.
Color selection plays an important role in your design. Brick style pavers come in a variety of colors, allowing you to create a classic look that complements your home. For a modern touch, cast concrete pavers can mimic the appearance of natural stone while being cost-effective.
Cobblestone pavers add traditional charm, while granite offers both durability and elegance.
Keep in mind the intended use of your patio. If it's for entertaining, make certain your chosen pavers can withstand foot traffic. Additionally, consider that block paving is resistant to cracking and damage from weather extremes, ensuring your patio remains beautiful for years to come.
Finally, think about sunlight orientation and how the colors will interact throughout the day. By carefully selecting your pavers, you'll lay a solid foundation for an inviting outdoor space that reflects your style.
Designing the Layout
Designing the layout of your block paving patio can greatly impact both its functionality and aesthetic appeal. Start by evaluating your yard's dimensions and shape to identify the best location. Consider existing structures and slopes that may affect your design.
Think about how you intend to use the space—whether for intimate gatherings or large parties—and create a rough sketch to visualize the layout.
For layout optimization, select a pattern that complements your patio's shape. Popular choices include running bond, herringbone, and basketweave. If heavy traffic is expected, herringbone patterns offer superior interlock and stability.
Incorporate borders using different materials or patterns to define zones and enhance elegance. Don't forget to use contrasting colors and textures to add visual interest.
Plan the size and shape carefully, ensuring there's a smooth flow for easy movement. Designate specific areas for dining and lounging, and include features like seating, pathways, and focal points. Additionally, consulting with trusted block paving companies can provide valuable insights and professional guidance to achieve the best results.
Building the Foundation
With the layout set, it's time to focus on building a solid foundation for your block paving patio.
Start by excavating the area to a depth that accommodates 4 to 6 inches of compacted gravel. Using foundation materials like crushed stone or gravel guarantees excellent drainage solutions and stability. As you dig, make sure to remove any obstructions and verify there are no underground utilities in your way.
Once the area is cleared, compact the soil to create a sturdy base. If you choose to use landscape fabric, lay it down now to prevent weed growth.
Fill the excavated space with your gravel, compacting it with a tamper or plate compactor as you go. After achieving a firm layer, add a one-inch bedding layer of coarse sand or fine gravel.
Level the bedding layer to guarantee a smooth surface for your pavers. Don't forget to slope the patio slightly away from structures to facilitate proper drainage. Implementing a permeable block paving solution can further enhance your patio's drainage efficiency.
Before you proceed, conduct a final inspection of the base for any imperfections. A solid foundation sets the stage for a beautiful and functional block paving patio.
Laying the Pavers
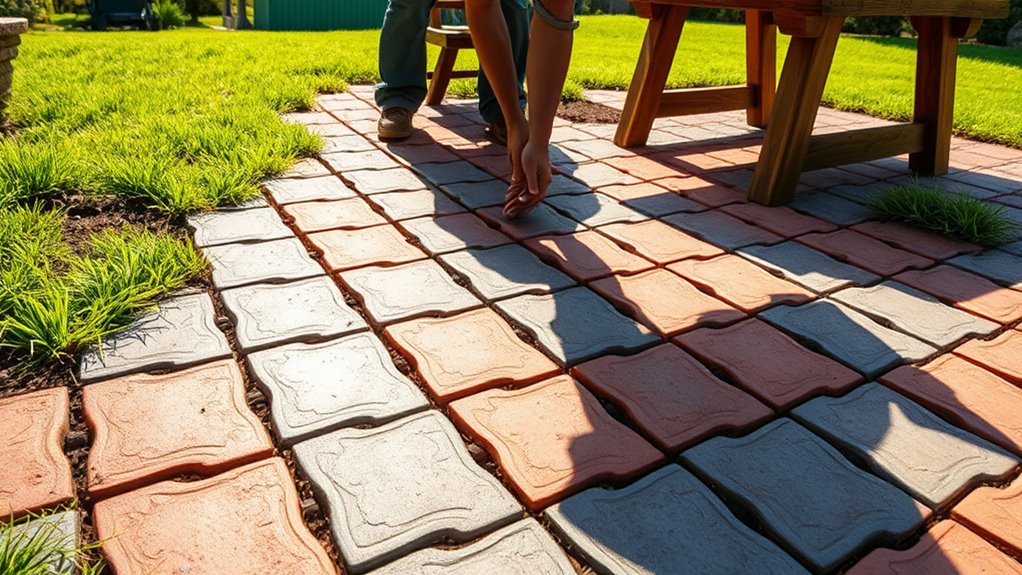
Laying the pavers is an essential step that transforms your prepared foundation into a stunning patio. Start by choosing your paving pattern—whether it's herringbone or a classic running bond, the right design sets the tone for your outdoor space.
- Begin Strong: Lay perimeter pavers first to create a solid frame, ensuring everything else aligns perfectly.
- Precision Matters: Use paver alignment techniques to keep blocks straight against your borders. Adjust with a rubber mallet for a snug fit and avoid any gaps.
- Cut with Care: For those tricky edges, master block cutting methods with a block splitter or diamond disc saw, remembering to avoid cuts smaller than a third of a block.
As you lay each paver, regularly check your pattern alignment and level. Start from the bottom of a slope or a straight edge, placing blocks 45mm above the desired finished level. Additionally, ensure that your installation complies with planning legislation for drainage provisions, as this is crucial for longevity and sustainability.
With each tap and adjustment, you're building not just a patio, but a space for cherished gatherings and joyful memories. Take your time—perfection is worth the effort!
Finishing Touches
Once the pavers are firmly in place, the finishing touches bring your block paving patio to life.
Start with a thorough sweep to clear away debris, preparing for the sand application. Spread kiln-dried sand across the entire surface, making sure it fills all joints between the blocks. Use a vibrating plate to compact the sand, repeating this process until every gap is filled.
Next, perform a final compaction of the entire area and inspect it for evenness. If you notice any irregularities, adjust the blocks as needed. Clean the surface to remove any excess sand, making sure of a smooth finish.
Now, consider sealing options to enhance and protect your patio. Sealing not only guards against stains but also boosts the overall aesthetic. It's advisable to apply sealant every few years to maintain the integrity of your paving.
There are various sealers available, including water-based and solvent-based options. Before applying, test the sealer on a small, inconspicuous area to verify compatibility.
Maintenance Tips
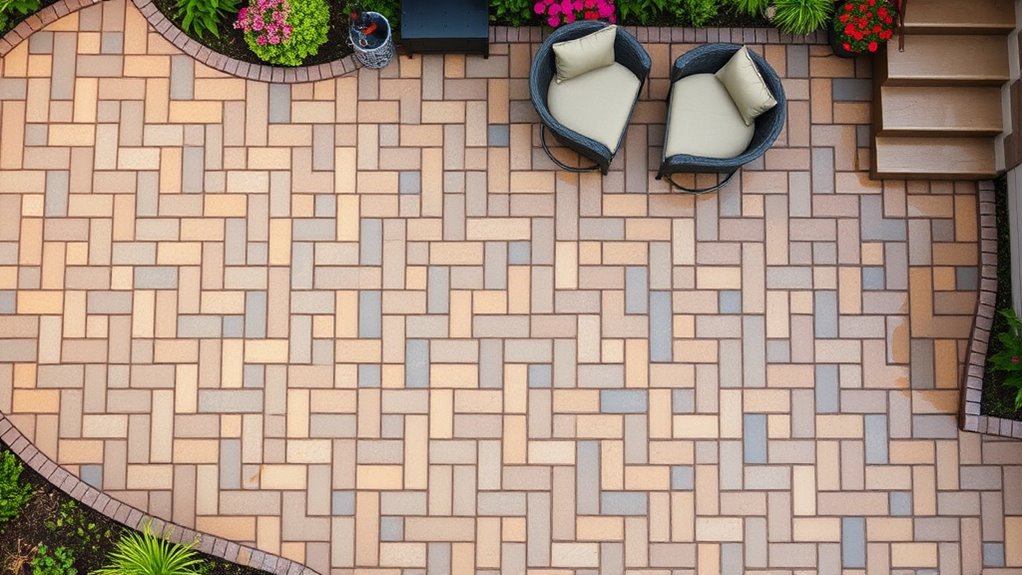
To keep your block paving patio looking its best, regular maintenance is essential. By implementing seasonal maintenance, you can guarantee longevity and aesthetics. Here are three key steps you shouldn't overlook:
- Spring and Summer Care: Regularly sweep away debris and inspect for damage. If you notice any eroded joint sand, replenish it promptly to maintain stability.
- Autumn Preparation: Clear fallen leaves to prevent staining and guarantee drainage channels are free from blockages. This helps prevent water pooling and potential damage during winter.
- Winter Strategies: When snow falls, use a plastic shovel or snow blower for removal. Avoid de-icing chemicals; instead, opt for sand for traction.
For cleaning techniques, employ pressure washing with a medium setting to avoid dislodging joint sand, or use a stiff-bristled brush and soapy water for stubborn stains. Additionally, regular inspection of drainage systems is crucial to ensure they function correctly.
Always rinse thoroughly and allow the surface to dry completely. Remember, by being proactive with maintenance, you can enjoy a beautiful and functional outdoor space for years to come.
Conclusion
In the end, your block paving patio can transform your outdoor space into a vibrant gathering spot, much like a canvas waiting for a masterpiece. By carefully planning, choosing the right materials, and executing each step with precision, you'll create an inviting area that beckons friends and family. Remember, regular maintenance keeps your patio looking fresh, ensuring it remains the heart of your outdoor entertaining for years to come. So, roll up your sleeves and get started!

Adding curb appeal to your home can be a daunting task, but it doesn't have to be. Designing and installing Read more

As homeowners, we are always looking for ways to improve and add value to our properties. One popular choice for Read more

Block paving, like a well-tended garden, is a testament to the care and attention given to one's property. Just as Read more